In my last article, I talked about all of the terrible things that await our Heroes in Nightmare Escape from Dol Guldur. It’s a punishingly difficult quest in solo, and it definitely doesn’t play fair. But I challenged myself to beat the Nightmare quests with thematic decks, so I can’t stop at the third quest!
Building the deck
I have tried a lot of different deck designs against this monster of a quest. There are 20 different decks sitting in my RingsDB decklist with the “dolguldur” tag, some of which have gone through sufficient evolution over time as to count as four or five different decks in their own right.
Any deck that plans to descend into the dark dungeons of Dol Guldur is going to have to contend with the forcible removal of one of its Heroes for the first several rounds. That makes dual-sphere decks difficult, since you can’t be certain your off-sphere Hero will be present. You can use Heroes with some sort of multisphere nature like Amarthiúl or Gandalf to get around this, but the easiest thing to do is go monosphere.
The trouble with monosphere decks, of course, is that they tend to struggle in one area or another, and Escape from Dol Guldur doesn’t cut you any breaks. Mono-Spirit decks will struggle to kill the hoard of Enemies that come pouring out of the encounter deck, while Mono-Tactics and Mono-Lore decks will probably struggle to make fast enough progress. Mono-Leadership has a tendency to stall out when it runs out of cards, and its generally wimpy Allies aren’t worth as much when you’re restricted to playing only 1 per turn.
Even so, I have found monosphere to be the best way to go, if you can find some way to compensate for your deck’s inherent weaknesses. I had some success with a Mono-Leadership Thorin Oakenshield / Dáin Ironfoot / Balin Dwarf mining deck. The theory was to use Hidden Cache and We Are Not Idle to generate resources to make up for the missing hero, and to slip some extra Allies into play using tricks like Sneak Attack, To Me O My Kinsfolk!, and A Very Good Tale. The hope was to be able to use Dwarves’ legendary ability to generate big numbers and ramp quickly to outpace the encounter deck.


“The Line of Durin” on RingsDB
Ultimately, though, I only ever scored a single victory in over a hundred games, and I wasn’t ever able to replicate it. Dol Guldur demanded more consistency than the deck had to offer. Something would always get out of hand, whether it was getting swarmed by Enemies faster than I could combat them, losing control of the questing situation, or busting the threat threshold before I could complete the quest. It doesn’t help that Dwarf Allies tend to fall on their faces in the willpower department when Dáin has been thrown in the dungeon.
I was similarly close with a Mono-Spirit Arwen Undómiel / Glorfindel / Círdan the Shipwright Elf deck. The idea with this one was to mostly ignore combat, and instead just dump out as much willpower as quickly as possible, using all kinds of Event-based willpower boosts like Children of the Sea, Courage Awakened, and Elwing’s Flight to get around the limit of 1 Ally per turn. The hope was that if the encounter deck dealt me few enough Enemies, I could rush to the final round, when I could use Saruman (fetching him with The Seeing-stone, if need be) to cancel out the Nazgûl and cross the finish line.


“The Fading of the Elves” on RingsDB
I really wanted this deck to work because it had a distinct White Council feel to it, and that just seemed right for a quest taking place at Dol Guldur. It was tantalizingly close, too, since it could get to stage 2 and rescue the prisoner with much greater consistency than any other deck I have tried to date. Unfortunately, it still didn’t quest fast enough to avoid an ill fate; threat climbed too high too quickly and before the end of the game it always found itself engaged with a ton of Enemies, leading inevitably to death by undefended attacks. I was ultimately only able to score a single win with this deck despite countless games, some of them being snuffed out just short of victory.
But I had learned something: when the cards fall just right, it is possible to put out willpower fast enough to keep pace with the encounter deck. What really did me in was surpassing the engagement cost of enough nasty Enemies to the point that I could no longer avoid combat. Maybe I could buy more time with a Secrecy deck? 2-Hero Secrecy is definitely out of the question, since then I’d be down to 1 resource per turn in the early game. So maybe I could go with Hobbits? Frodo would actually be great for helping to ease the burden of unavoidable undefended attacks, potentially buying me another turn or two to close out the quest before being buried in a sea of Enemies.
Then I remembered a scene from the Fellowship of the Ring film. The Fellowship is in Lórien, and Frodo tells Galadriel of his fears about being the Ring-bearer. She tells him that “even the smallest person can change the course of the future.” In the books, the line is delivered (in somewhat more wordy fashion) by Elrond in Rivendell, but the sentiment is so poignant, and the mood seems to fit so well that I decided to run with it. If we’re appointing this task to Frodo to descend into dark places, then surely we should send the wisdom of Galadriel along with him.
I had finally found my tiny hope for this impossible task.
Deck: Even the Smallest Person
Theme: The courage of Hobbits and the counsel of the Wise


Hero (3)
Frodo Baggins (Conflict at the Carrock)
Galadriel (Celebrimbor’s Secret)
Merry (The Wastes of Eriador)
Ally (23)
2x Arwen Undómiel (The Watcher in the Water)
1x Bilbo Baggins (The Road Darkens)
3x Curious Brandybuck (The Wastes of Eriador)
3x Defender of the Naith (Trouble in Tharbad)
1x Galadhrim Weaver (The Treachery of Rhudaur)
3x Galadriel’s Handmaiden (Celebrimbor’s Secret)
3x Gandalf (Core Set)
2x Glorfindel (Flight of the Stormcaller)
2x Sam Gamgee (The Thing in the Depths)
3x Saruman (The Voice of Isengard)
Attachment (15)
3x Good Meal (The Redhorn Gate)
2x Hobbit Pipe (The Black Riders)
2x Hobbit Pony (The Wastes of Eriador)
3x Nenya (Celebrimbor’s Secret)
3x Resourceful (The Watcher in the Water)
2x Unexpected Courage (Core Set)
Event (12)
3x Elrond’s Counsel (The Watcher in the Water)
3x Hasty Stroke (Core Set)
3x A Elbereth! Gilthonial! (Shadow and Flame)
3x The Galadhrim’s Greeting (Core Set)
3 Heroes, 50 Cards
Strategy
This deck is locked in a constant battle to keep my threat low, ideally under 28 (the engagement cost of the Dol Guldur Spider). It’s not always possible, but between Merry, Galadriel, Gandalf, The Galadhrim’s Greeting, and Elrond’s Counsel, I at least have a chance to keep things under control in the early game. It’s not usually possible to stay under the 20 threat threshold for Secrecy for very long, however. I can generally trigger Merry’s ability during staging to ensure I’m under 20 for my first planning phase, but there are no guarantees after that.
It’s a little hard to know what makes a good starting hand, but I usually look for Nenya or Resourceful, or a bunch of threat reduction that I could drop on turn 1 (Good Meal + The Galadhrim’s Greeting, for instance). Sam Gamgee is usually a good turn 1 card too. In my first hand, I’m explicitly not looking for Gandalf or Saruman, and if I have too many copies of them I’ll usually mulligan. Saruman especially is vital for the late game, but I don’t want him clogging up my precious hand slots too early.
I typically just have to accept that I’m going to fail to quest successfully on the first round. Unless I get a bunch of Treacheries during setup, I’m just not going to be able to contend with the 3-6 cards in the staging area during the first quest phase with only 2 resources and (up to) 1 Ally. The hope is that on the second round, I will have moved a Location to being active, engaged some low-attack Enemy, and begun to build up some semblance of a board presence.
If he hasn’t been captured, Frodo can take an undefended attack as threat each round if needed. His ability saves my bacon a lot of times when a terrible shadow effect would make me lose a hero if the damage weren’t cancelled. If Frodo isn’t around, or if he has already used his ability, it’s preferable to have Allies do the blocking rather than Heroes, since they’re in less danger to loss by shadow effect (or just less vital). Galadriel’s ability makes it easier to have an Ally around to block an attack on the turn it enters play.
This deck doesn’t have many ways to remove Enemies from the game. Ally Glorfindel can do it, sometimes requiring multiple turns to hack away at an Enemy. If my threat is under control, I can use Gandalf’s direct damage ability to kill a pesky Enemy, and potentially his 4 attack to kill another. Saruman has 5 attack, although I want to avoid using him too early due to his Doomed 3 since threat is a constant issue. I can also use A Elbereth! Gilthonial! to remove an Enemy from the game. These are all pricey options, but it’s usually worth it just to avoid having to reserve a defender and take another shadow effect every round.
As soon as I feel like questing is more or less “under control” (or as under control as it ever can be) I grab all 3 of the objectives. Gandalf’s Map goes on either Galadriel or Merry since they never attack or defend anyway, the Shadow Key goes on Frodo so that he can take the 1 damage per round as threat, and the 2-threat-per-round Dungeon Torch can go on anyone, but preferably Galadriel or Merry since they’re less likely to be defending and lose it to a shadow effect. The great thing about grabbing all three objectives is that it essentially defangs the Spider of Dol Guldur, which seems to be the #1 card which is most likely to ruin an otherwise good run. If I can get to this point without having seen one (or perhaps having seen only one as a shadow card, which probably killed off an Ally) I just might have a chance at making it to the endgame.

I have two choices for dealing with the Nazgûl:
1. Use Saruman to remove it from play and quest through Stage 3 all at once
2. Take one hit from it and then use A Elbereth! Gilthonial! to banish it to the bottom of the encounter deck


Which option I take depends on the cards in my hand at the time and the board state. If everything comes together just so, I might just have a chance.
Thematic concessions
Alright, so I know that the name of the deck, as well as its initial inspiration, came from the films rather than the books. For some, that might be grounds for immediate disqualification. But we can just as easily apply the original quote from the books to this deck as well:
This quest may be attempted by the weak with as much hope as the strong. Yet such is oft the course of deeds that move the wheels of the world: small hands do them because they must, while the eyes of the great are elsewhere.
In many was the quote from the book fits even better than the quote from the film. This deck is filled with both the weak and the strong, the small and the great. The Elf-lords, the Wizards, and the Wise all have their role to play, but ultimately it is the small hands—the handmaidens, the weavers, and the Hobbits young and old—who carry the deck forward and bring its goal to completion.
From this perspective, the only card that really sticks out to me as odd is Saruman. By the time Frodo and Galadriel speak with one another he is known to be under the influence of the Shadow, and so it seems strange to continue to count him among the Wise. It gives the deck echoes of a White Council theme, which I still like for a quest at Dol Guldur, but at the end of the day he’s here because he’s a key card in my strategy for getting rid of the Nazgûl.
Play notes
Win ratio: 2/80 (2.5%)
I have played a lot of games of Nightmare Dol Guldur. A lot. So it should come as no surprise that I am very proud of my 2.5% win rate. As I stated before, for super-difficult quests like Dol Guldur my goal is merely to build a deck capable of winning twice, no matter how many games it takes. It is no exaggeration to say that I have played many hundreds of games of Dol Guldur in pursuit of this goal.
I have actually begun to have problems building decks for other quests. After I place three Heroes together my next thought is always, “But what if this one is the prisoner?” before realizing with delight that I am actually allowed to use all three of my heroes from the very first round! Imagine that.
Let’s talk about my two victories. In both wins, a lot of things had to line up:
- I got reasonable encounter cards during Setup (about 6 threat or less)
- I got Resourceful in my opening hand, and Nenya shortly thereafter
- One of the two Hobbits was the prisoner (although I did have one close game where Galadriel was the prisoner, so I think a prisoner-Galadriel win is probably possible)
- No more than 1 Spider of Dol Guldur showed up in the first half of the game
- The low-engagement Enemies were spread out so I could deal with them one by one
- Either Saruman or A Elbereth! Gilthonial! showed up in time for the finale
In my first victory, I used A Elbereth! Gilthonial! to dispatch the Nazgûl; in the second Saruman had the honor.
There’s a lot I can say about the losses too. The most common reason for losing was getting overwhelmed by a flood of Enemies. Either this happened because my threat got too high and everything engaged at once or because too many low-threat Enemies (like the King Spider, Cavern Guardian, or Crazed Captive) came out of the encounter deck before I had a chance to deal with them. This accounted for 46 (~59%) of my losses.


Another common source of failure was not being able to clear a copy of Torture Chamber before it accumulated 4 resource tokens. Sometimes this was due to getting two Torture Chambers in play at the same time, sometimes it was just due to threat building up in the staging area faster than I could clear it, and sometimes this was due to other card effects like the Torture Master or Catacomb Inspection speeding up the process. One game I actually lost during Setup before I got to play a single card as a result of this sort of combo-ing. The Torture Chamber accounted for 10 (~13%) of my losses.


Nasty Hero-killing shadow effects like Hummerhorns and Torture Master accounted for 7 (~9%) of my losses when I otherwise had the combat situation under control. The Spider of Dol Guldur’s shadow effect was probably indirectly responsible for a lot of losses because Frodo converted its +9 attack to threat, which translated into a loss by over-engagement. Other decks that I tried struggled even more with bad shadow effects, but in this deck Frodo was able to mitigate their effects a lot of the time.
I conceded 13 (~17%) of my games as a result of failing to quest successfully at a time when a Dungeon Jailor was in the staging area, causing an Objective to get shuffled back into the encounter deck. In theory, I might have seen them again as an encounter reveal rather than a shadow card and still managed to pull out a win, but the odds were not good, and I was not about to play a long, drawn out game with poor chances of success (and no good way to tip the odds in my favor).

Then there were 2 losses that didn’t fit into any of the above categories. I only actually hit 50 threat once. I didn’t put it in my notes, but I believe this was the result of a few copies of Dungeon Labyrinth (which gets +1 threat each round) getting out of hand and causing me to quest unsuccessfully multiple times in a row. My other weird loss was to an encounter card combo during Setup of a King Spider exhausting Merry, followed by two Necromancer’s Reaches dealing 1 damage each to every exhausted character, killing him. Galadriel was captured prisoner, and poor Frodo was left to face the dungeons alone. Scoop!
Despite all of those losses, I still managed to pull my two victories from the jaws of defeat, allowing me to move on with my project. It was a fun puzzle to try to solve, but I have to say I’m glad that it’s done now. I won’t mind if I don’t play this quest again for a long, long time.
The next quest is Nightmare The Hunt for Gollum. It’s a quest that I haven’t played much since the early days of the game, and I’m looking forward to revisiting it in Nightmare mode. It’s on the easier side, so I’m going to use it as an opportunity to experiment with something a little different. We’ll find out how well that pans out next time!

Pingback: Escape from Dol Guldur – Quest Analysis | Darkling Door
“Win ratio: 2/80 (2.5%)”
You are insane, man. Insane.
Looking forward to seeing you tackle some not-so-tormenting quests. Always nice to see some great themed decks.
LikeLike
Ha! Thanks. I’m looking forward to tackling some not-so-tormenting quests!
LikeLike
I admire your attempt to stick to theme as well as to build a deck that could function with any hero as a prisoner. When I tackled this one I just scooped whenever a non-ideal hero was captured. It is one of my favourite quests for the fact that even if I build a deck specifically to counter it, my win rate is still abysmal. This is one of my successes: https://youtu.be/0AdkF31nxHg?list=PLuyP-hlzlHjewgoSr56i8AtRqDbWzQCwx
I like how you kept track of all the ways you lost! I’d love to read a turn-by-turn write up of one of your victories if you have it.
LikeLike
Yeah, I totally get it when people either choose the Hero they want captured or just concede until they get the choice they want; anything to make the quest a little more reasonable. The rules-lawyer in me has always wanted to find a way to play the quest “as-is” though, since losing a random Hero is kind of the main mechanic (even if it’s really unfair and downright not fun).
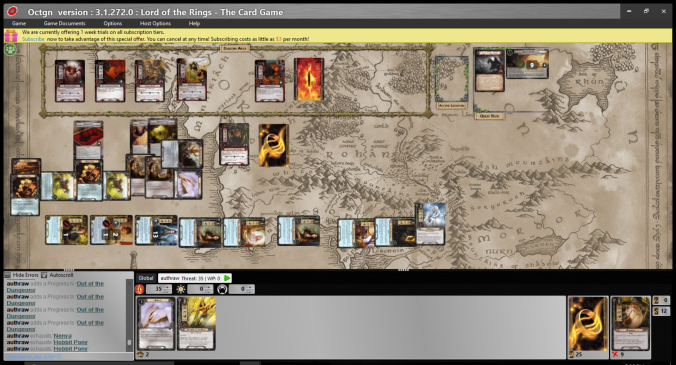
Unfortunately I didn’t take turn-by-turn notes. I played so many games with so many different decks that I didn’t know which ones would be wins until the very end, and taking detailed notes would slow me down too much. I suppose I could have kept the OCTGN log, but I didn’t think about it at the time. I did take a screenshot of one of my victories though, for posterity:
Even though I didn’t take detailed notes, I did want to record my reasons for losing since I figured it would be fun to write about about all of the different ways this quest can punch you in the face and take your lunch money. 🙂
LikeLike
Pingback: Nightmare Wrap-Up: Core + Shadows of Mirkwood (part 1) | Darkling Door
2/80
…
I had to read that a few times before it sunk in. Loving this series, keep it up!
LikeLike
Thanks! I’m having a great time with the series. This was a pretty crazy quest though; I’m hoping not to have to have another win ratio like that for quite some time. 😉
LikeLike
Pingback: The Long Arm Of Mordor – Vision Of The Palantir
Pingback: Nightmare Escape from Mount Gram | Darkling Door