The final quest of the Shadows of Mirkwood cycle, Return to Mirkwood, follows the end of Aragorn’s hunt for Gollum as he escorts the writhing creature back to the titular forest to be imprisoned in Thranduil’s dungeons. This is one of the handful of quests from the early game that scales incredibly poorly for solo play.

One of the players must be selected to guard Gollum, an Objective with 5 hit points (and no other stats) who takes all undefended damage for you. Of course, Gollum needs to reach Thranduil’s palace alive (despite the players often wanting to strangle him) so if he is destroyed the game is lost. The catch is that the player guarding Gollum must raise their threat by a whopping 3 points at the end of each round, after which they may optionally choose a different player to guard Gollum.
The quest has 4 stages. The first simply requires 12 progress to complete. The second requires 3, but the player guarding Gollum is not allowed to commit to the quest (unless they are the only player in the game) and the players lose if they quest unsuccessfully during this stage. The third stage requires 7 progress to complete, and while it is in play the player guarding Gollum is not permitted to play cards from hand. The final stage requires 2 progress to complete and requires that all Enemies in play be defeated. Oh, and just for fun, all Enemies in play engage the player guarding Gollum at the start of each Combat phase, so it’s not even possible to take on the Enemies one by one.
As if the quest effects and threat raises weren’t enough, many of the cards in the encounter deck also specifically target the player guarding Gollum. These can range from the relatively benign Tantrum Treachery Wasted Provisions, which discards the top 10 cards of Gollum’s player’s deck, to the significantly less benign Tantrum Treachery Gollum’s Bite, which deals 4 damage to a Hero controlled by Gollum’s player, to the you-have-got-to-be-kidding-me Spider Enemy Attercop, Attercop, which sports 8 attack and automatically engages Gollum’s player at the start of the Engagement phase, no matter which quest stage you are on.


This is the central problem that solo players face: the core mechanic is that it’s really annoying to be stuck guarding Gollum, and the corresponding strategy involves figuring out how to hot-potato him around the table to spread all the nastiness around. But for solo players, there’s nobody else around to share Gollum with. You’re stuck with the insufferable little wretch the whole game, with no reprieve at all.
The new cards in the Nightmare version mostly tighten up the theme, switching out some of the more far-flung Locations for more Mirkwood-appropriate ones, and replacing some of the more benign Enemies with stronger ones that target the player guarding Gollum in one way or another. The major mechanical shift in the Nightmare version is that it places a greater focus on Tantrum Treacheries. The quest’s Nightmare mode card states:
Forced: At the beginning of the quest phase, the player who is guarding Gollum must either exhaust a hero he controls or resolve the “when revealed” effect of the topmost Tantrum card in the encounter discard pile.
There’s really only one benign Tantrum card (the aforementioned Wasted Provisions) and even that one you don’t want suffer too many turns in a row. For the most part, you’ll probably want to exhaust a Hero to cancel this Forced effect every round.
Oh, and in case you managed to slip past the nastiest Enemies in the deck during the rest of the quest, the quest’s Nightmare mode card also adds a copy of Attercop, Attercop to the staging area as soon as you reach stage 4.
Between the 3 extra threat per turn, the loss of a Hero action each round, and the nastier-than-usual quest and encounter card effects, what chance does a solo player have? Well, there is a tiny silver lining to being the only player in the game. There are several cards in the deck that are meant to mess with your ability to bounce Gollum around as much as you’d like to—but since you weren’t planning on switching players anyway, their textboxes might as well be blank!


It doesn’t really make up for all of the terrible abuse solo players have to suffer because they can’t hand Gollum off to someone else. It does, however, provide just enough of a foothold to help solo players stabilize. This small reprieve turns out to be the missing scale on the dragon’s hide, and I plan to exploit it to land the killing blow against this otherwise unassailable quest.
Building the deck
As with all of the other quests of the Shadows of Mirkwood cycle, I’ll start with a version of Aragorn as my first hero. There are a lot of things to worry about in this quest, but my chief concern is with my rapidly rising threat, so the threat-resetting Lore version seems like a no-brainer here.

The next step is to pick a theme for the deck. I played around with a couple of Silvan builds, trying to tie in with the Mirkwood setting, but the tribe didn’t quite seem up to the particular challenges that Return to Mirkwood provides. I need to pull out all the stops here—a quest of this caliber demands Middle Earth’s finest!
So I’m going to bring the White Council.
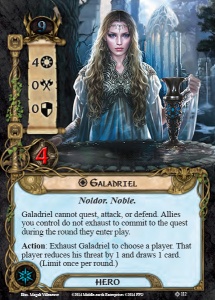
According to “Of the Rings of Power and the Third Age” from the Silmarillion, the members of the White Council were Elrond, Galadriel, Círdan,”other lords of the Eldar”, Gandalf, and Saruman. Ideally, I’d like to pull my other two Heroes from that list. Galadriel seems like a natural first choice; I can exhaust her to prevent Gollum from throwing a Tantrum each round and still get the benefit of her passive ability that allows Allies to commit to the quest without exhausting.
Who gets the final Hero slot? Gandalf, Elrond, and Círdan are all excellent choices, but there’s one problem: I want to keep my threat low so that I can make the most of Aragorn’s reset ability, and adding a second 12-14 threat Hero isn’t really compatible with that strategy.


Instead, let’s take advantage of the phrase “other lords of the Eldar”. Which lord of the Eldar do we turn to when we need good stats and a low starting threat? You guessed it, Spirit Glorfindel! Even though he’s not mentioned directly in the text, I think it’s fair to say that Glorfindel is on the short list of elven lords who might have been in the White Council, given Tolkien’s apparent fondness of him.
That means that Gandalf, Elrond, and Saruman go in as Allies. That actually works out great, since Galadriel lets them all pull double-duty with their beefy stats even though they leave play at the end of the round.


From here, I can fill in the rest of the deck with the usual power cards: cheap questers, Spirit and Lore staples like A Test of Will and Daeron’s Runes, and readying cards like Lembas and Miruvor.
I haven’t spoken yet about how I’m going to take advantage of this quest’s one weakness: encounter cards that occasionally whiff against solo players. Take a look at the decklist below and see if you can pick out my strategy (or just skip to the Strategy section).
Deck: Opposing the Shadow
Theme: Aragorn and the White Council


Hero (3)
Aragorn (The Watcher in the Water)
Galadriel (Celebrimbor’s Secret)
Glorfindel (Foundations of Stone)
Ally (19)
2x Arwen Undómiel (The Watcher in the Water)
1x Elrond (The Road Darkens)
3x Galadriel’s Handmaiden (Celebrimbor’s Secret)
3x Gandalf (Core Set)
3x Henamarth Riversong (Core Set)
1x Lindir (The Battle of Carn Dûm)
3x Ranger of Cardolan (The Wastes of Eriador)
3x Saruman (The Voice of Isengard)
Attachment (12)
3x Lembas (Trouble in Tharbad)
3x Light of Valinor (Foundations of Stone)
3x Miruvor (Shadow and Flame)
3x Ranger Spikes (Heirs of Númenor)
Event (20)
3x A Test of Will (Core Set)
3x A Watchful Peace (Heirs of Númenor)
3x Daeron’s Runes (Foundations of Stone)
3x Elrond’s Counsel (The Watcher in the Water)
3x Fair and Perilous (Across the Ettenmoors)
2x Free to Choose (Trouble in Tharbad)
3x Shadow of the Past (Return to Mirkwood)
3 Heroes, 51 Cards
Strategy
There are two primary concerns I have when playing Return to Mirkwood:
1. Threat
2. Really strong Enemies
Aragorn manages concern #1. My relatively low starting threat of 26 gives me approximately 9-10 rounds to win (give or take, depending on which Treacheries and Events show up). That’s not a lot of time to get through four quest stages, but it’s certainly doable.
Dealing with #2 is much more difficult. Many of the Enemies in this quest require 7-12 damage to kill in one hit, and swing for anything from 4 to 8. For the most part, I’m relying on chump blocking for defense and it’s pretty common for me to need 2 turns to dispatch any given Enemy. Gandalf and Saruman are a huge help in this department, and with Galadriel’s assistance they can contribute to the questing phase as well.
The fact remains that if I reveal too many Enemies too quickly, I’m just not going to make it. This is where A Watchful Peace and Shadow of the Past come into play.


While the Enemies and Treacheries in this quest are brutal, most of the Locations lose their bite against the solo player. Several of them have abilities that prevent Gollum from switching control or they do bad things to the players not guarding Gollum—so in solo, they’re effectively blank. Furthermore, many Locations only have 2 or 3 threat, and only require 2 progress to clear.
So the goal of this deck is to take advantage of any early-game luck I get and turn it into a recurring event. If the encounter deck happens to throw me a softball Location, I’ll just keep putting it back on top of the deck as often as possible, buying me more and more time to build up my forces, place progress on the quest, or deal with any Enemies that have found their way into play. If I get a Location early enough, I only have to worry about scary encounter reveals for about half of the game.
As such, I typically mulligan for A Watchful Peace—although I will keep any halfway decent hand that happens to have Light of Valinor.
Most rounds, I exhaust Galadriel to prevent Gollum from throwing a Tantrum at the start of the quest phase. If the top Tantrum in the discard pile is benign (which rarely happens) I might consider using her to draw cards instead. Aragorn and Glorfindel usually go a-questing, although I might hold one or both back if I anticipate combat.
If my luck holds out in the early game, I should be able to provide myself with just enough time to get some questing Allies down and push my way through the quest stages.
Thematic concessions
At first glance, including Aragorn in a deck that revolves around the White Council feels a bit odd, especially since there are so many different thematic and iconic Heroes to choose from who are actual members of the White Council. That said, there was no way I was going to leave Aragorn behind when I had brought him all the way through the rest of the cycle. The guy deserves to see the finale of his own story!
In a similar vein, Ranger of Cardolan feels a little thematically shaky too. The Dúnedain weren’t involved with the White Council at all, so the only way we can justify his inclusion is by association with Aragorn. Ultimately, I decided to include the Ranger for two key purposes: the first is as an emergency chump blocker in a quest where heavy-hitting Enemies abound, and the second was as a well-rounded Ally that can help quest in the early game and help attack in the late game. I have found that he serves both roles well enough to merit inclusion.

Play notes
Win ratio: 3/5 (60%)
When I started building decks to pit against Return to Mirkwood, I was pretty sure I would not meet my ideal goal of winning 3 out of 5 games; I resigned myself to the idea that this was going to be one of those just-try-to-win-two-games sorts of quests. Imagine how surprised I was when this deckbuild managed to win my first, second, and fifth games!
Now, I’m quite certain that my luck was unusually good over the course of those five games. If I were to play more, I suspect my win ratio would drop well below 50%. That said, I have definitely gained a newfound respect for encounter control cards; A Watchful Peace in particular worked much better than I expected.
Both of my losses were absolute. In the first one, I revealed Enemies for the first 3 cards and was quickly overwhelmed. In the second, I was unable to make progress quickly enough and I threatted out after 8 rounds. In neither game did I ever have much of a chance.
All three of my victories shared a few common traits: I was able to get both Henamarth Riversong and Light of Valinor down in the first couple of turns, and I got a benign Location early on which I was able to recur at least twice. None of them were easy victories, though: In my first, the Forced effect on Hummerhorns killed Galadriel and I had to limp on without her. Fortunately I had built up enough of a board state that I was still able to take the game over the finish line. In my second victory, I had a copy of Pursuing Warg-Rider stuck in the staging area (because it cannot be optionally engaged) that was preventing me from winning. I had to use Galadriel’s draw ability (and suffer the effects of the top Tantrum in the discard pile a few turns in a row) to draw into Saruman so that I could cancel it. My final victory ended at 49 threat, drawing the Gandalf I needed just in time to be able to kill a copy of Attercop, Attercop. A wizard is never late, indeed!
Final thoughts
And so ends the Shadows of Mirkwood cycle! An epic battle it was, to be sure. It was fun to find a satisfying solution to the puzzle that is Return to Mirkwood, Bane of Solo Players. I’m not sure I’ve ever played a quest where so many of my victories teetered precipitously on the edge of defeat.
Next I’m going to take a little time to look back on the Core and Shadows of Mirkwood cycle, as well as reflect on my Thematic Nightmare series as a whole. What went well? What will I improve in the future? What’s next? Find out next week!

Great post and great deck idea with A Watchful Peach and Shadow of the Past – both underused solo play cards to be sure! Looking forward to your write-ups for the next cycle!
LikeLiked by 1 person
Thanks! I like to keep Shadow of the Past in the back of my mind from time to time, but usually turns out to be a little too expensive to be worth playing. Somehow I always seem to forget about A Watchful Peace though! Well worth it in quests like this where Locations are benign.
LikeLike
Agreed. Great and insightful series! More reader interaction questions!
LikeLike
Thanks for the feedback! I’ll keep that in mind as I go through my upcoming series analysis.
LikeLike
Pingback: Nightmare Wrap-Up: Core + Shadows of Mirkwood (part 1) | Darkling Door
Pingback: Nightmare Wrap-up: Core + Shadows of Mirkwood (Part 2) | Darkling Door
Pingback: The Seige of Annúminas | Darkling Door